目录
前言
接着我的上一篇文章:Python实现照片卡通化,一拳打破次元壁 | 机器学习_阿良的博客-CSDN博客
我继续魔改一下,让该模型可以支持将gif动图或者视频,也做成卡通化效果。毕竟一张图可以那就带边视频也可以,没毛病。所以继给次元壁来了一拳,我在加两脚。
项目github地址:github地址
环境依赖
除了上一篇文章中的依赖,还需要加一些其他依赖,requirements.txt如下:

其他环境不太清楚的,可以看我前言链接地址的文章,有具体说明。
核心代码
不废话了,先上gif代码。
gif动图卡通化
实现代码如下:
#!/usr/bin/env python
# -*- coding: utf-8 -*-
# @Time    : 2021/12/5 18:10
# @Author  : 剑客阿良_ALiang
# @Site    :
# @File    : gif_cartoon_tool.py
# !/usr/bin/env python
# -*- coding: utf-8 -*-
# @Time    : 2021/12/5 0:26
# @Author  : 剑客阿良_ALiang
# @Site    :
# @File    : video_cartoon_tool.py

# !/usr/bin/env python
# -*- coding: utf-8 -*-
# @Time    : 2021/12/4 22:34
# @Author  : 剑客阿良_ALiang
# @Site    :
# @File    : image_cartoon_tool.py

from PIL import Image, ImageEnhance, ImageSequence
import torch
from torchvision.transforms.functional import to_tensor, to_pil_image
from torch import nn
import os
import torch.nn.functional as F
import uuid
import imageio


# -------------------------- hy add 01 --------------------------
class ConvNormLReLU(nn.Sequential):
    def __init__(self, in_ch, out_ch, kernel_size=3, stride=1, padding=1, pad_mode="reflect", groups=1, bias=False):
        pad_layer = {
            "zero": nn.ZeroPad2d,
            "same": nn.ReplicationPad2d,
            "reflect": nn.ReflectionPad2d,
        }
        if pad_mode not in pad_layer:
            raise NotImplementedError

        super(ConvNormLReLU, self).__init__(
            pad_layer[pad_mode](padding),
            nn.Conv2d(in_ch, out_ch, kernel_size=kernel_size, stride=stride, padding=0, groups=groups, bias=bias),
            nn.GroupNorm(num_groups=1, num_channels=out_ch, affine=True),
            nn.LeakyReLU(0.2, inplace=True)
        )


class InvertedResBlock(nn.Module):
    def __init__(self, in_ch, out_ch, expansion_ratio=2):
        super(InvertedResBlock, self).__init__()

        self.use_res_connect = in_ch == out_ch
        bottleneck = int(round(in_ch * expansion_ratio))
        layers = []
        if expansion_ratio != 1:
            layers.append(ConvNormLReLU(in_ch, bottleneck, kernel_size=1, padding=0))

        # dw
        layers.append(ConvNormLReLU(bottleneck, bottleneck, groups=bottleneck, bias=True))
        # pw
        layers.append(nn.Conv2d(bottleneck, out_ch, kernel_size=1, padding=0, bias=False))
        layers.append(nn.GroupNorm(num_groups=1, num_channels=out_ch, affine=True))

        self.layers = nn.Sequential(*layers)

    def forward(self, input):
        out = self.layers(input)
        if self.use_res_connect:
            out = input + out
        return out


class Generator(nn.Module):
    def __init__(self, ):
        super().__init__()

        self.block_a = nn.Sequential(
            ConvNormLReLU(3, 32, kernel_size=7, padding=3),
            ConvNormLReLU(32, 64, stride=2, padding=(0, 1, 0, 1)),
            ConvNormLReLU(64, 64)
        )

        self.block_b = nn.Sequential(
            ConvNormLReLU(64, 128, stride=2, padding=(0, 1, 0, 1)),
            ConvNormLReLU(128, 128)
        )

        self.block_c = nn.Sequential(
            ConvNormLReLU(128, 128),
            InvertedResBlock(128, 256, 2),
            InvertedResBlock(256, 256, 2),
            InvertedResBlock(256, 256, 2),
            InvertedResBlock(256, 256, 2),
            ConvNormLReLU(256, 128),
        )

        self.block_d = nn.Sequential(
            ConvNormLReLU(128, 128),
            ConvNormLReLU(128, 128)
        )

        self.block_e = nn.Sequential(
            ConvNormLReLU(128, 64),
            ConvNormLReLU(64, 64),
            ConvNormLReLU(64, 32, kernel_size=7, padding=3)
        )

        self.out_layer = nn.Sequential(
            nn.Conv2d(32, 3, kernel_size=1, stride=1, padding=0, bias=False),
            nn.Tanh()
        )

    def forward(self, input, align_corners=True):
        out = self.block_a(input)
        half_size = out.size()[-2:]
        out = self.block_b(out)
        out = self.block_c(out)

        if align_corners:
            out = F.interpolate(out, half_size, mode="bilinear", align_corners=True)
        else:
            out = F.interpolate(out, scale_factor=2, mode="bilinear", align_corners=False)
        out = self.block_d(out)

        if align_corners:
            out = F.interpolate(out, input.size()[-2:], mode="bilinear", align_corners=True)
        else:
            out = F.interpolate(out, scale_factor=2, mode="bilinear", align_corners=False)
        out = self.block_e(out)

        out = self.out_layer(out)
        return out


# -------------------------- hy add 02 --------------------------

def handle(gif_path: str, output_dir: str, type: int, device='cpu'):
    _ext = os.path.basename(gif_path).strip().split('.')[-1]
    if type == 1:
        _checkpoint = './weights/paprika.pt'
    elif type == 2:
        _checkpoint = './weights/face_paint_512_v1.pt'
    elif type == 3:
        _checkpoint = './weights/face_paint_512_v2.pt'
    elif type == 4:
        _checkpoint = './weights/celeba_distill.pt'
    else:
        raise Exception('type not support')
    os.makedirs(output_dir, exist_ok=True)
    net = Generator()
    net.load_state_dict(torch.load(_checkpoint, map_location="cpu"))
    net.to(device).eval()
    result = os.path.join(output_dir, '{}.{}'.format(uuid.uuid1().hex, _ext))
    img = Image.open(gif_path)
    out_images = []
    for frame in ImageSequence.Iterator(img):
        frame = frame.convert("RGB")
        with torch.no_grad():
            image = to_tensor(frame).unsqueeze(0) * 2 - 1
            out = net(image.to(device), False).cpu()
            out = out.squeeze(0).clip(-1, 1) * 0.5 + 0.5
            out = to_pil_image(out)
            out_images.append(out)
    # out_images[0].save(result, save_all=True, loop=True, append_images=out_images[1:], duration=100)
    imageio.mimsave(result, out_images, fps=15)
    return result


if __name__ == '__main__':
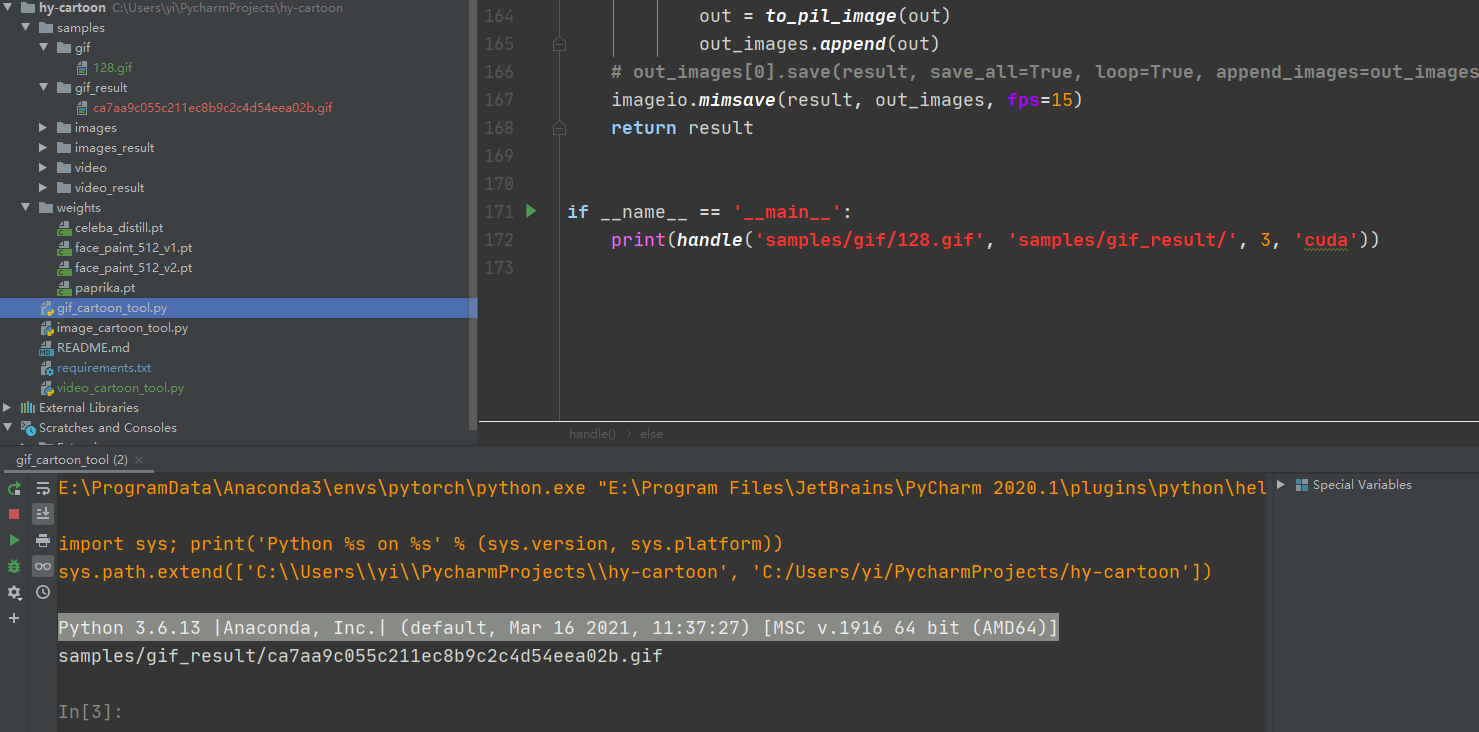
    print(handle('samples/gif/128.gif', 'samples/gif_result/', 3, 'cuda'))
代码说明:
1、主要的handle方法入参分别为:gif地址、输出目录、类型、设备使用(默认cpu,可选cuda使用显卡)。
2、类型主要是选择模型,最好用3,人像处理更生动一些。
执行验证一下
下面是我准备的gif素材

执行结果如下

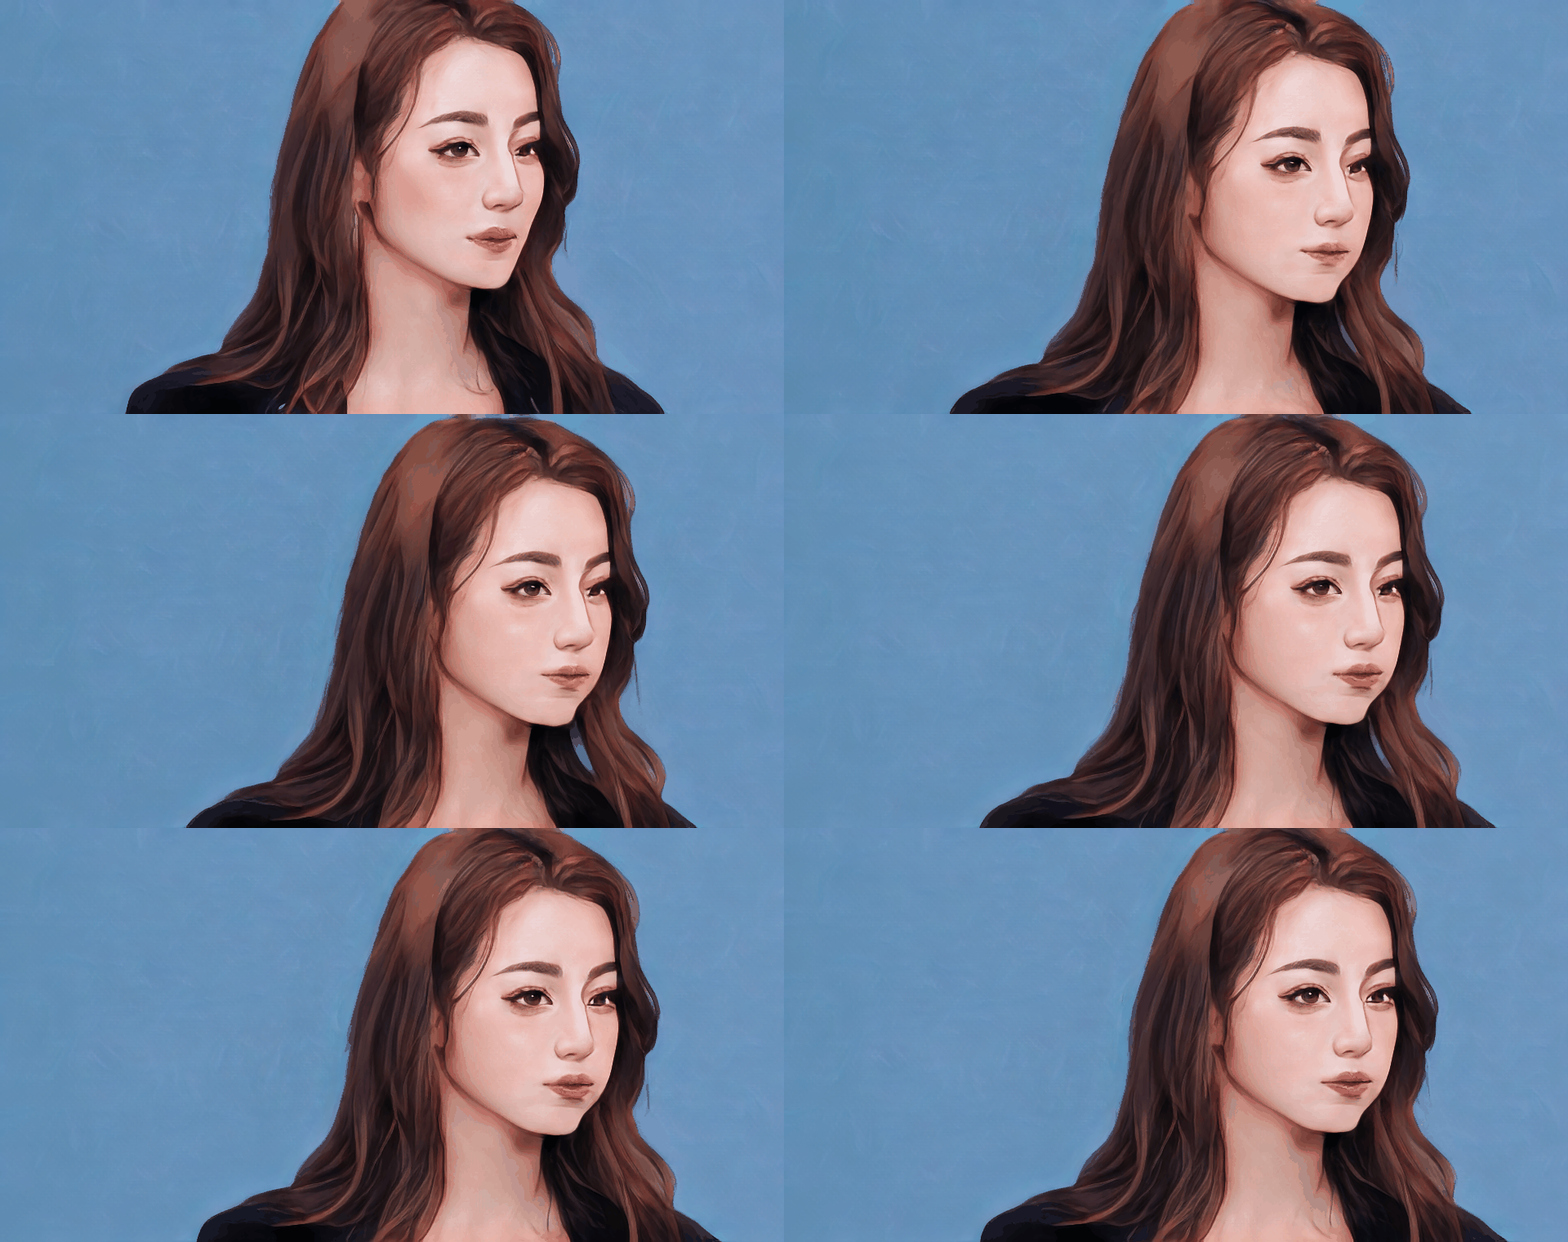
看一下效果

哈哈,有点意思哦。
视频卡通化
实现代码如下:
#!/usr/bin/env python
# -*- coding: utf-8 -*-
# @Time    : 2021/12/5 0:26
# @Author  : 剑客阿良_ALiang
# @Site    :
# @File    : video_cartoon_tool.py

# !/usr/bin/env python
# -*- coding: utf-8 -*-
# @Time    : 2021/12/4 22:34
# @Author  : 剑客阿良_ALiang
# @Site    :
# @File    : image_cartoon_tool.py

from PIL import Image, ImageEnhance
import torch
from torchvision.transforms.functional import to_tensor, to_pil_image
from torch import nn
import os
import torch.nn.functional as F
import uuid
import cv2
import numpy as np
import time
from ffmpy import FFmpeg


# -------------------------- hy add 01 --------------------------
class ConvNormLReLU(nn.Sequential):
    def __init__(self, in_ch, out_ch, kernel_size=3, stride=1, padding=1, pad_mode="reflect", groups=1, bias=False):
        pad_layer = {
            "zero": nn.ZeroPad2d,
            "same": nn.ReplicationPad2d,
            "reflect": nn.ReflectionPad2d,
        }
        if pad_mode not in pad_layer:
            raise NotImplementedError

        super(ConvNormLReLU, self).__init__(
            pad_layer[pad_mode](padding),
            nn.Conv2d(in_ch, out_ch, kernel_size=kernel_size, stride=stride, padding=0, groups=groups, bias=bias),
            nn.GroupNorm(num_groups=1, num_channels=out_ch, affine=True),
            nn.LeakyReLU(0.2, inplace=True)
        )


class InvertedResBlock(nn.Module):
    def __init__(self, in_ch, out_ch, expansion_ratio=2):
        super(InvertedResBlock, self).__init__()

        self.use_res_connect = in_ch == out_ch
        bottleneck = int(round(in_ch * expansion_ratio))
        layers = []
        if expansion_ratio != 1:
            layers.append(ConvNormLReLU(in_ch, bottleneck, kernel_size=1, padding=0))

        # dw
        layers.append(ConvNormLReLU(bottleneck, bottleneck, groups=bottleneck, bias=True))
        # pw
        layers.append(nn.Conv2d(bottleneck, out_ch, kernel_size=1, padding=0, bias=False))
        layers.append(nn.GroupNorm(num_groups=1, num_channels=out_ch, affine=True))

        self.layers = nn.Sequential(*layers)

    def forward(self, input):
        out = self.layers(input)
        if self.use_res_connect:
            out = input + out
        return out


class Generator(nn.Module):
    def __init__(self, ):
        super().__init__()

        self.block_a = nn.Sequential(
            ConvNormLReLU(3, 32, kernel_size=7, padding=3),
            ConvNormLReLU(32, 64, stride=2, padding=(0, 1, 0, 1)),
            ConvNormLReLU(64, 64)
        )

        self.block_b = nn.Sequential(
            ConvNormLReLU(64, 128, stride=2, padding=(0, 1, 0, 1)),
            ConvNormLReLU(128, 128)
        )

        self.block_c = nn.Sequential(
            ConvNormLReLU(128, 128),
            InvertedResBlock(128, 256, 2),
            InvertedResBlock(256, 256, 2),
            InvertedResBlock(256, 256, 2),
            InvertedResBlock(256, 256, 2),
            ConvNormLReLU(256, 128),
        )

        self.block_d = nn.Sequential(
            ConvNormLReLU(128, 128),
            ConvNormLReLU(128, 128)
        )

        self.block_e = nn.Sequential(
            ConvNormLReLU(128, 64),
            ConvNormLReLU(64, 64),
            ConvNormLReLU(64, 32, kernel_size=7, padding=3)
        )

        self.out_layer = nn.Sequential(
            nn.Conv2d(32, 3, kernel_size=1, stride=1, padding=0, bias=False),
            nn.Tanh()
        )

    def forward(self, input, align_corners=True):
        out = self.block_a(input)
        half_size = out.size()[-2:]
        out = self.block_b(out)
        out = self.block_c(out)

        if align_corners:
            out = F.interpolate(out, half_size, mode="bilinear", align_corners=True)
        else:
            out = F.interpolate(out, scale_factor=2, mode="bilinear", align_corners=False)
        out = self.block_d(out)

        if align_corners:
            out = F.interpolate(out, input.size()[-2:], mode="bilinear", align_corners=True)
        else:
            out = F.interpolate(out, scale_factor=2, mode="bilinear", align_corners=False)
        out = self.block_e(out)

        out = self.out_layer(out)
        return out


# -------------------------- hy add 02 --------------------------

def handle(video_path: str, output_dir: str, type: int, fps: int, device='cpu'):
    _ext = os.path.basename(video_path).strip().split('.')[-1]
    if type == 1:
        _checkpoint = './weights/paprika.pt'
    elif type == 2:
        _checkpoint = './weights/face_paint_512_v1.pt'
    elif type == 3:
        _checkpoint = './weights/face_paint_512_v2.pt'
    elif type == 4:
        _checkpoint = './weights/celeba_distill.pt'
    else:
        raise Exception('type not support')
    os.makedirs(output_dir, exist_ok=True)
    # 获取视频音频
    _audio = extract(video_path, output_dir, 'wav')
    net = Generator()
    net.load_state_dict(torch.load(_checkpoint, map_location="cpu"))
    net.to(device).eval()
    result = os.path.join(output_dir, '{}.{}'.format(uuid.uuid1().hex, _ext))
    capture = cv2.VideoCapture(video_path)
    size = (int(capture.get(cv2.CAP_PROP_FRAME_WIDTH)), int(capture.get(cv2.CAP_PROP_FRAME_HEIGHT)))
    print(size)
    videoWriter = cv2.VideoWriter(result, cv2.VideoWriter_fourcc(*'mp4v'), fps, size)
    cul = 0
    with torch.no_grad():
        while True:
            ret, frame = capture.read()
            if ret:
                print(ret)
                image = to_tensor(frame).unsqueeze(0) * 2 - 1
                out = net(image.to(device), False).cpu()
                out = out.squeeze(0).clip(-1, 1) * 0.5 + 0.5
                out = to_pil_image(out)
                contrast_enhancer = ImageEnhance.Contrast(out)
                img_enhanced_image = contrast_enhancer.enhance(2)
                enhanced_image = np.asarray(img_enhanced_image)
                videoWriter.write(enhanced_image)
                cul += 1
                print('第{}张图'.format(cul))
            else:
                break
    videoWriter.release()
    # 视频添加原音频
    _final_video = video_add_audio(result, _audio, output_dir)
    return _final_video


# -------------------------- hy add 03 --------------------------
def extract(video_path: str, tmp_dir: str, ext: str):
    file_name = '.'.join(os.path.basename(video_path).split('.')[0:-1])
    print('文件名:{},提取音频'.format(file_name))
    if ext == 'mp3':
        return _run_ffmpeg(video_path, os.path.join(tmp_dir, '{}.{}'.format(uuid.uuid1().hex, ext)), 'mp3')
    if ext == 'wav':
        return _run_ffmpeg(video_path, os.path.join(tmp_dir, '{}.{}'.format(uuid.uuid1().hex, ext)), 'wav')


def _run_ffmpeg(video_path: str, audio_path: str, format: str):
    ff = FFmpeg(inputs={video_path: None},
                outputs={audio_path: '-f {} -vn'.format(format)})
    print(ff.cmd)
    ff.run()
    return audio_path


# 视频添加音频
def video_add_audio(video_path: str, audio_path: str, output_dir: str):
    _ext_video = os.path.basename(video_path).strip().split('.')[-1]
    _ext_audio = os.path.basename(audio_path).strip().split('.')[-1]
    if _ext_audio not in ['mp3', 'wav']:
        raise Exception('audio format not support')
    _codec = 'copy'
    if _ext_audio == 'wav':
        _codec = 'aac'
    result = os.path.join(
        output_dir, '{}.{}'.format(
            uuid.uuid4(), _ext_video))
    ff = FFmpeg(
        inputs={video_path: None, audio_path: None},
        outputs={result: '-map 0:v -map 1:a -c:v copy -c:a {} -shortest'.format(_codec)})
    print(ff.cmd)
    ff.run()
    return result


if __name__ == '__main__':
    print(handle('samples/video/981.mp4', 'samples/video_result/', 3, 25, 'cuda'))
代码说明
1、主要的实现方法入参分别为:视频地址、输出目录、类型、fps(帧率)、设备类型(默认cpu,可选择cuda显卡模式)。
2、类型主要是选择模型,最好用3,人像处理更生动一些。
3、代码设计思路:先将视频音频提取出来、将视频逐帧处理后写入新视频、新视频和原视频音频融合。
关于如何视频提取音频可以参考我的另一篇文章:python 提取视频中的音频 | Python工具类_阿良的博客-CSDN博客
关于如何视频融合音频可以参考我的另一篇文章:
Python 视频添加音频(附代码) | Python工具_阿良的博客-CSDN博客
4、视频中间会产生临时文件,没有清理,如需要可以修改代码自行清理。
验证一下
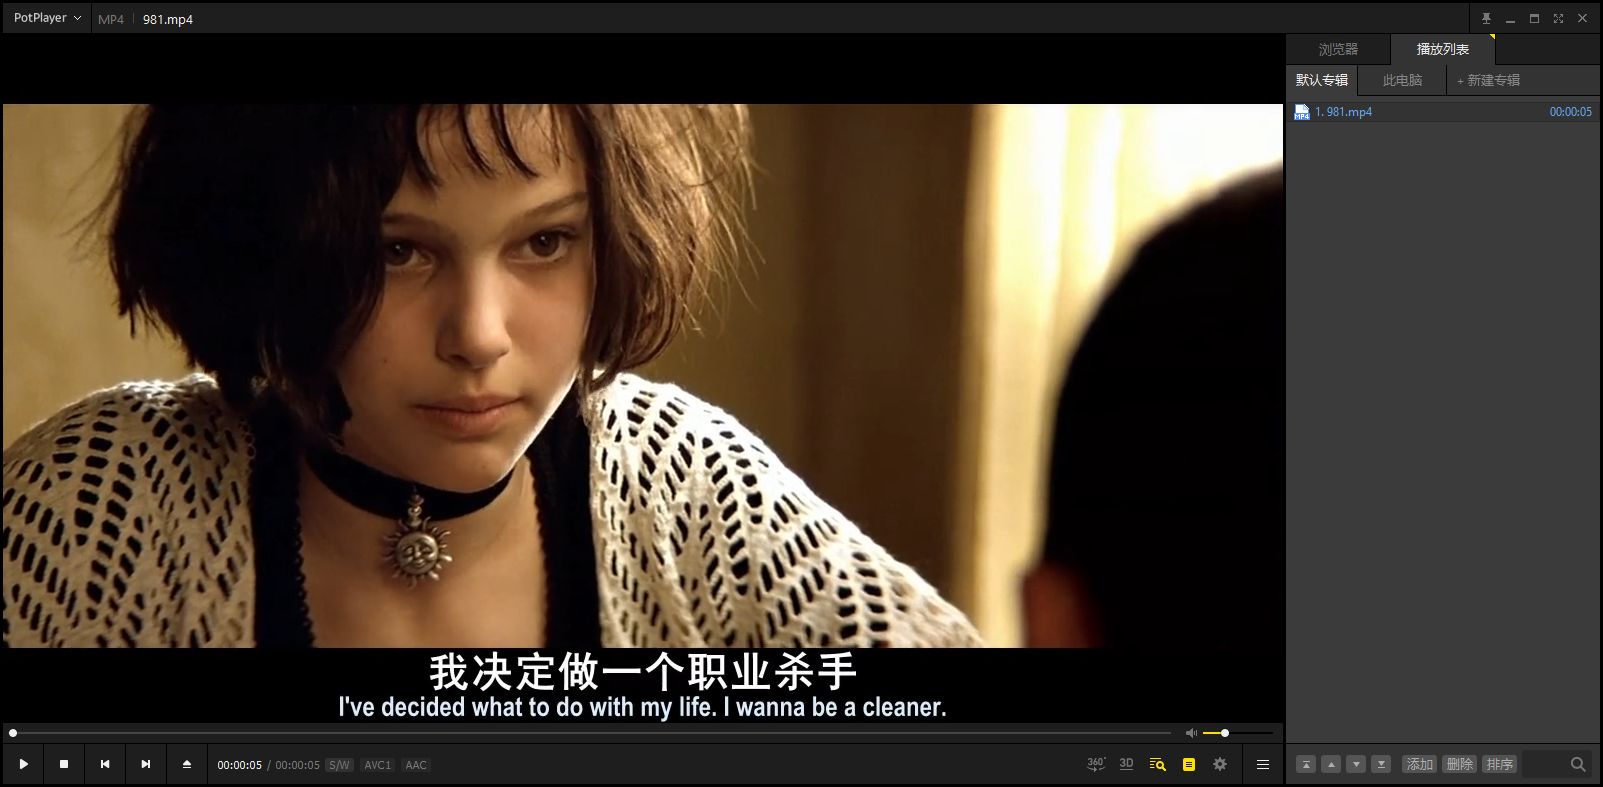
下面是我准备的视频素材截图,我会上传到github上。

执行结果

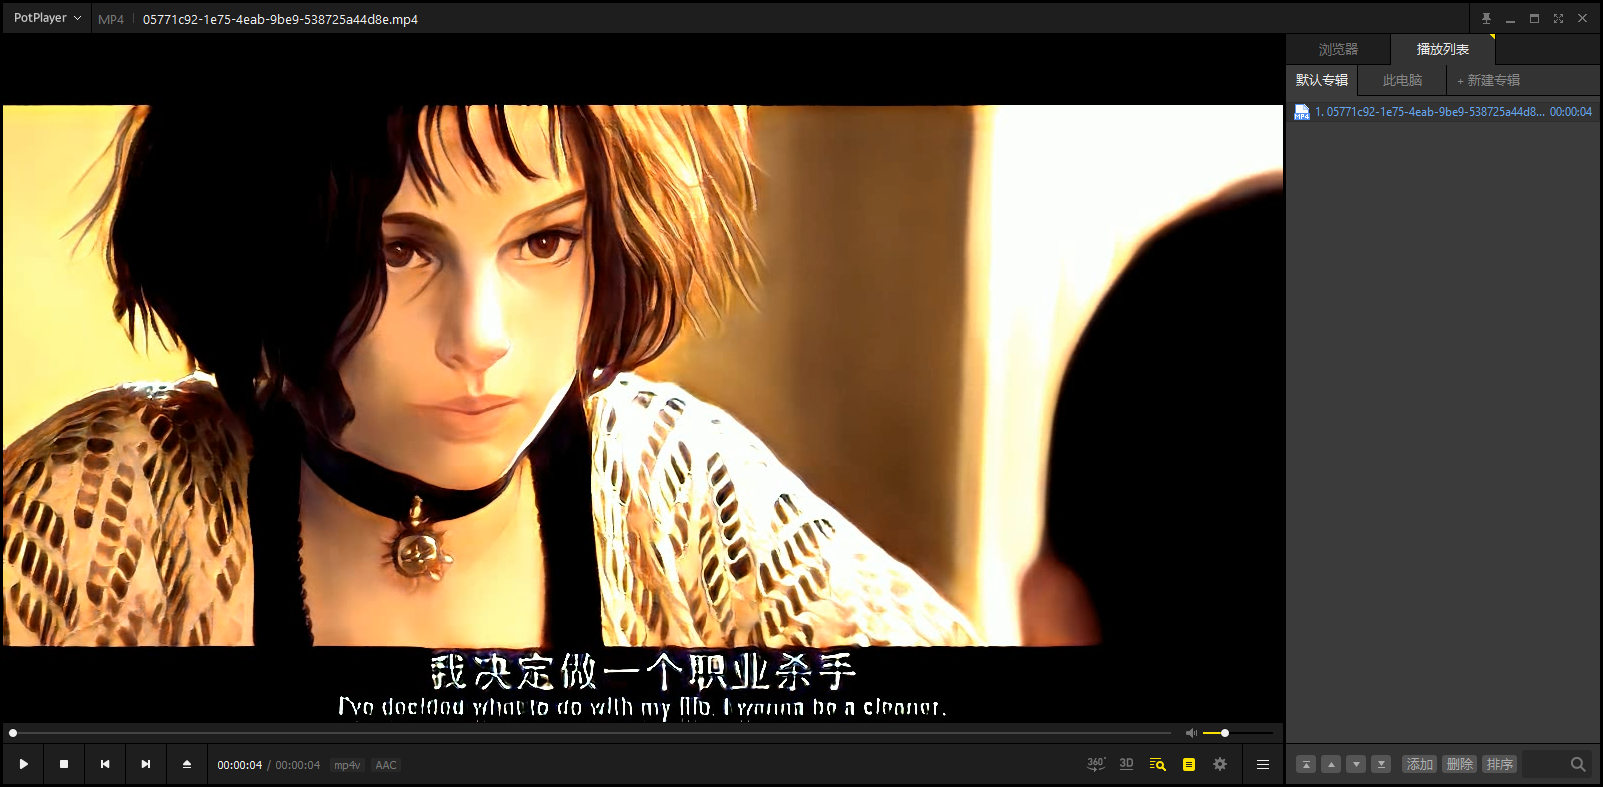
看看效果截图

还是很不错的哦。
总结
这次可不是没什么好总结的,总结的东西蛮多的。首先我说一下这个开源项目目前模型的一些问题。
1、我测试了不少图片,总的来说对亚洲人的脸型不能很好的卡通化,但是欧美的脸型都比较好。所以还是训练的数据不是很够,但是能理解,毕竟要专门做卡通化的标注数据想想就是蛮头疼的事。所以我建议大家在使用的时候,多关注一下项目是否更新了最新的模型。
2、视频一但有字幕,会对字幕也做处理。所以可以考虑找一些视频和字幕分开的素材,效果会更好一些。
总的来说,这个项目还是很不错的,两天的学习也让我收获很多。
分享:
你跳不出这个世界,是因为你不知道这个世界有多大,一旦你知道了,你就超出了它。
——《悟空传》
如果本文对你有用的话,请点个赞吧,谢谢!

神龙|纯净稳定代理IP免费测试>>>>>>>>天启|企业级代理IP免费测试>>>>>>>>IPIPGO|全球住宅代理IP免费测试


